Assign your work
Assigning your work is one of the first strides you can take towards easy and accurate time tracking. As you assign your work to different projects, Clockk learns what projects your work falls under.
After a while, your work will get automatically tracked for you, no assigning needed! In order for this to happen though, you must train Clockk by assigning new work to different projects.
How to do it:
Log in to your profile at app.clockk.com
Click on the Activity Tab to view your days' work. Here, you should see a column titled Unassigned (internally, we call this column "the scary grey wall." Don't worry. It's not actually that daunting 😊)
Click on one of the grey boxes. Your tracked files should appear. It will look something like this:

Click on Assign next to the file you want to assign. If you have no clients or projects created, you will be asked to create a client and project. It will look like this:
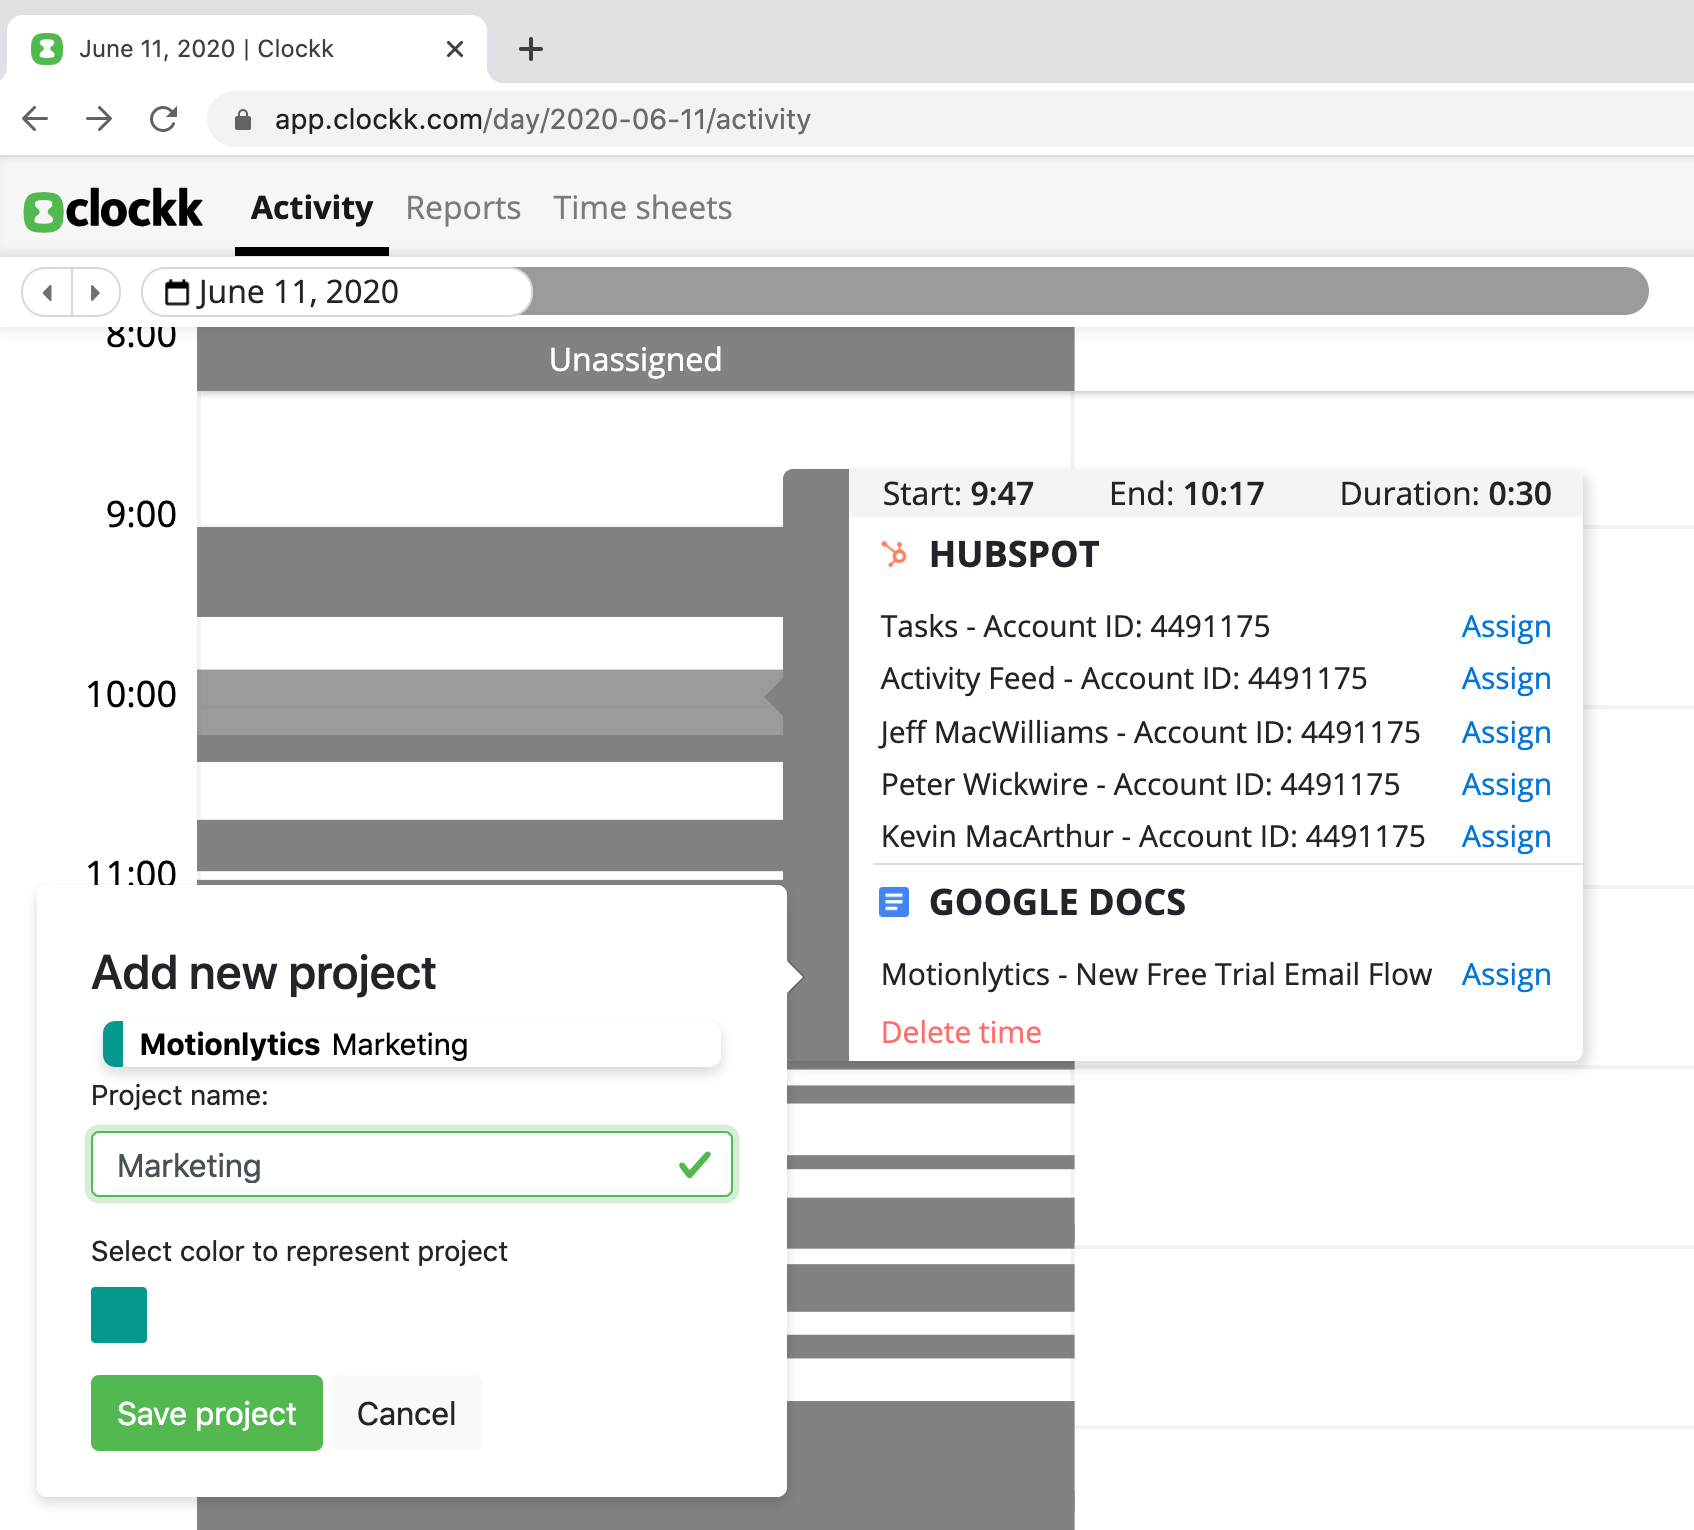
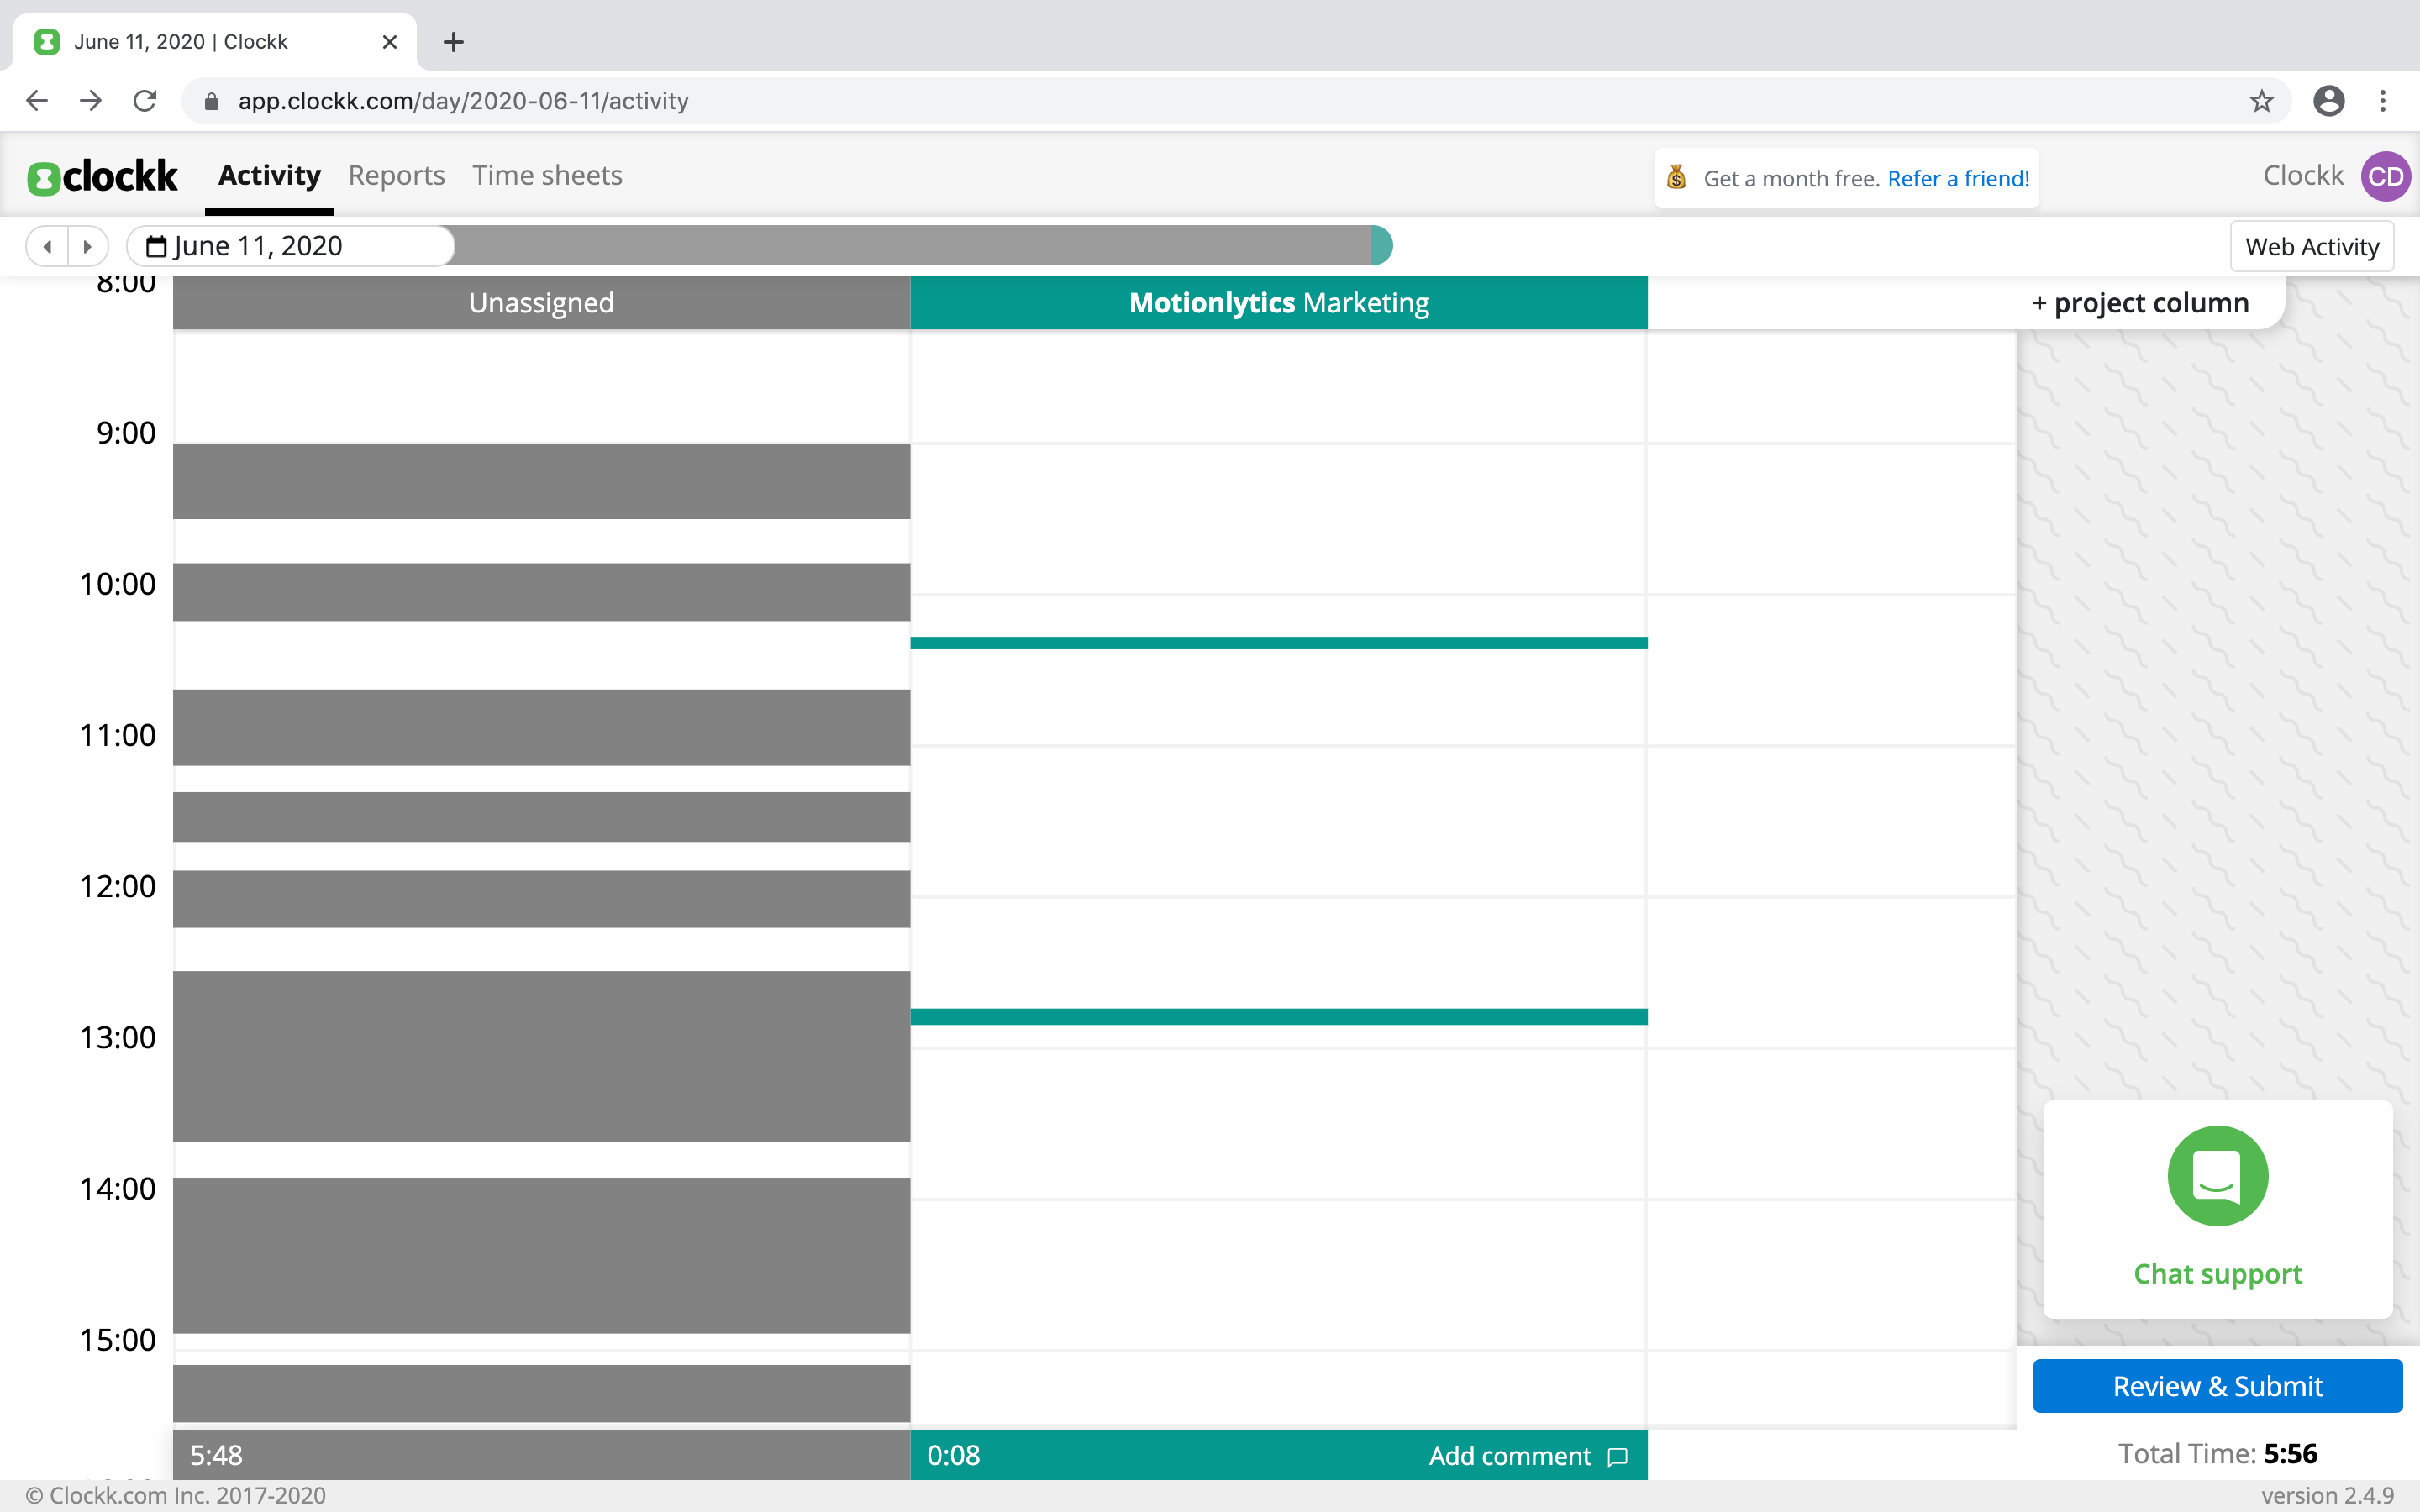
Once you click Save project, a new column will appear to the right. This column will be named after the client and project to which you assigned your work.
If you work on the same file later on in the day, Clockk will automatically assign the time for you!
You've successfully assigned your first work in Clockk 🥳.
Now, Clockk's AI will start recognizing which work goes with which project and will do it automatically for you. Almost like magic 🧙♂️.

Tip: Add your company name as a client so you can track internal time like admin, vacation/holiday, sales activities, etc. Check out our list of good internal projects that you might want to track 👍