Outlook.com/Hotmail.com
NOTE: These are instructions to set up Microsoft Outlook Calendar in the Clockk Desktop app using the .ics feed option. This is probably NOT what you want. Try this first: Open the Clockk Desktop app and then click Sign in with Microsoft.
Log in to Outlook.com in your browser, and go to your Calendar view.
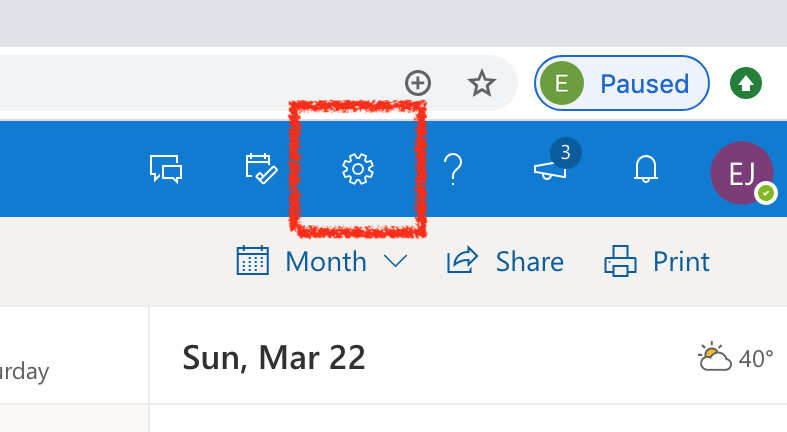
Click on the gear icon in the top right-hand corner of the screen.
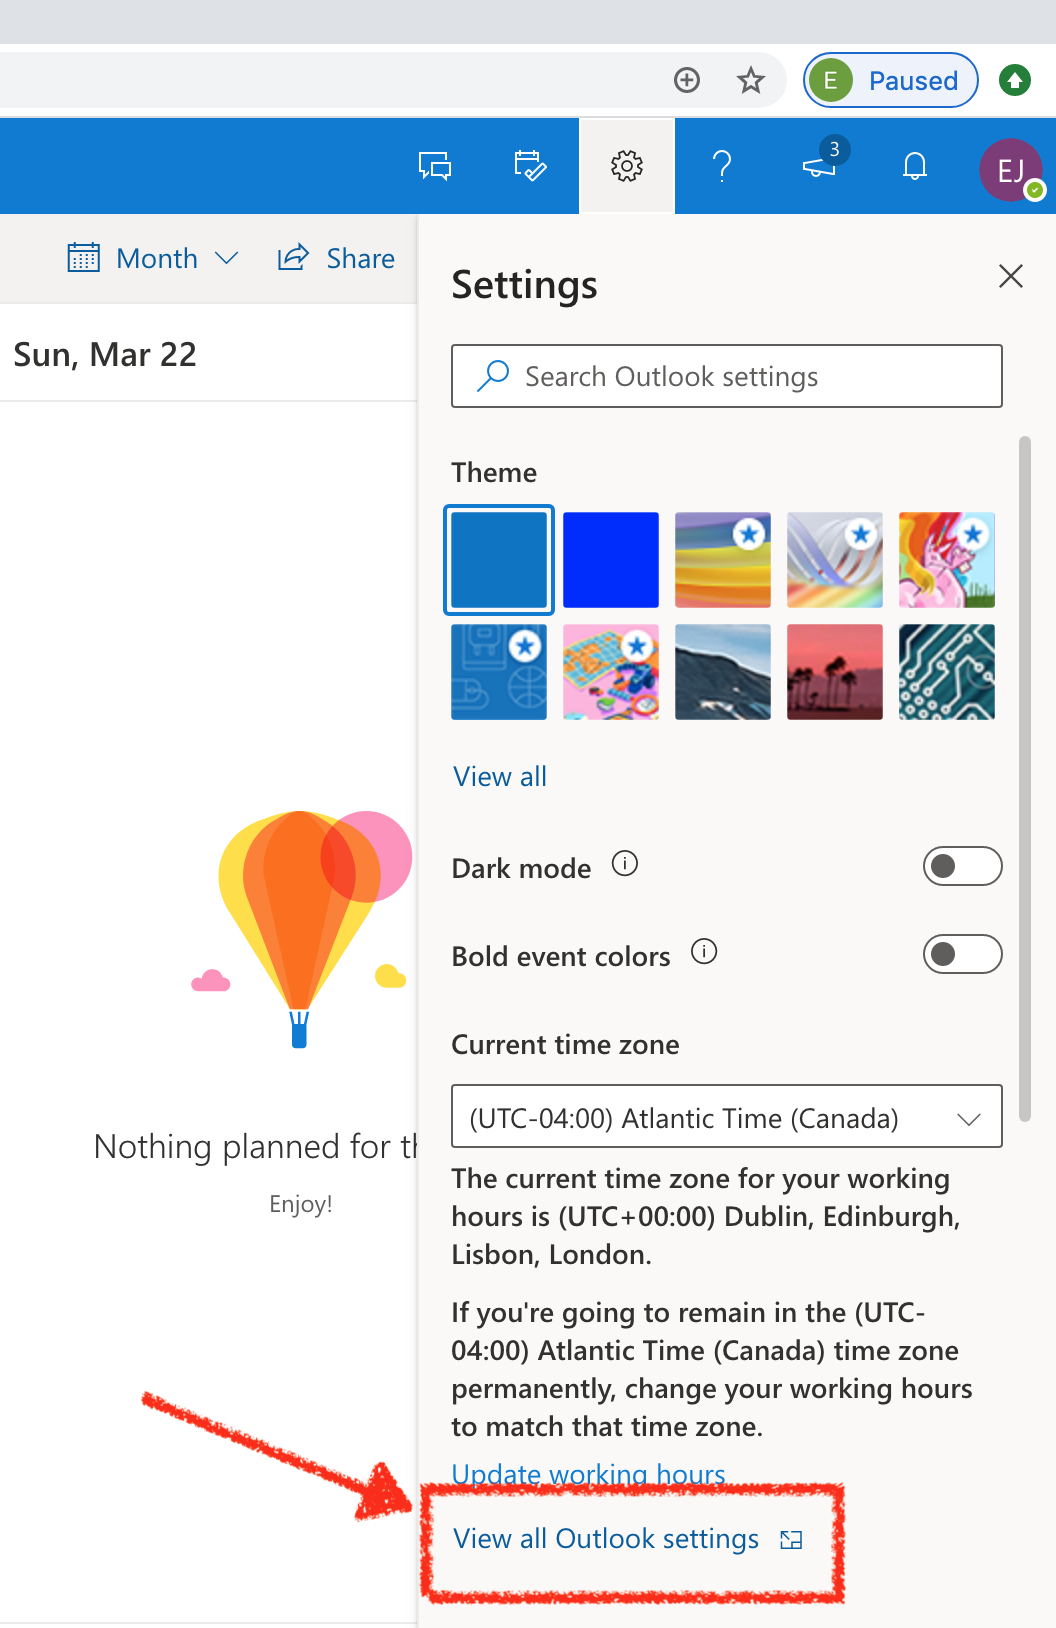
A panel will appear from the right. Click on “View all Outlook settings”, which you can find at the bottom.
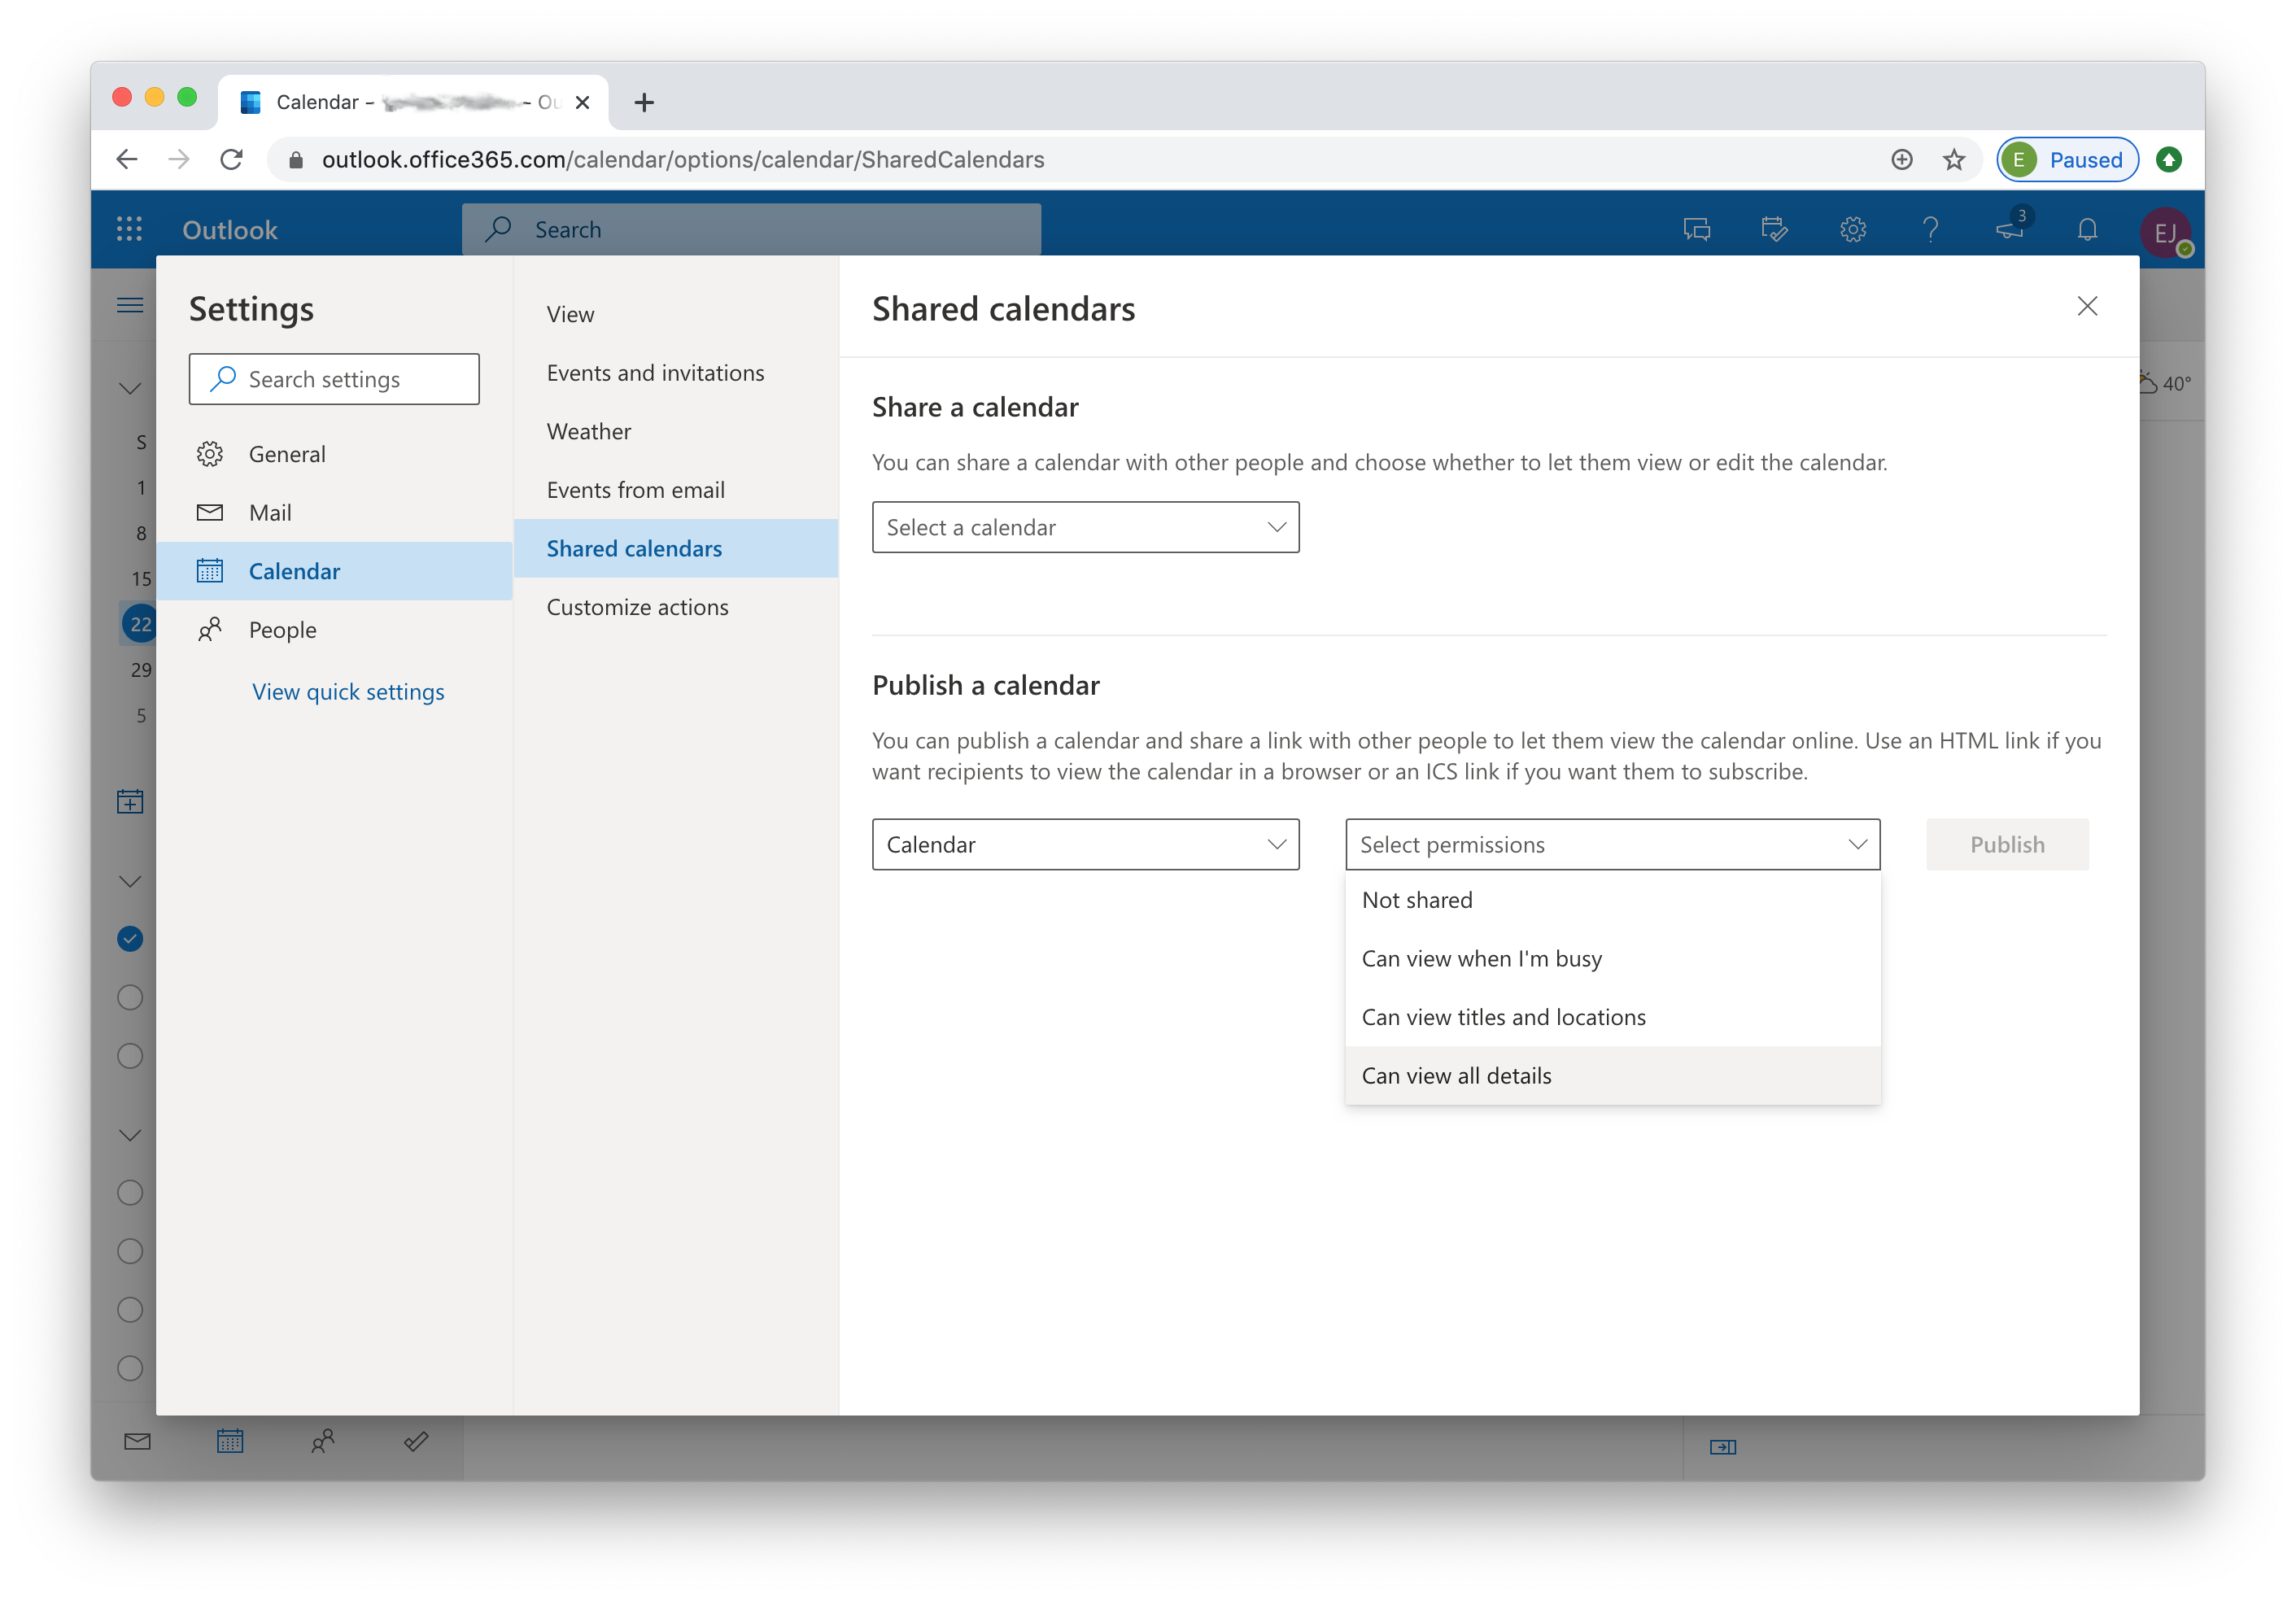
In the window that appears, click on Calendar » Shared calendars. In the “Publish a calendar” section, select your calendar, and under Permissions choose “Can view all details”.
Click “Publish”.
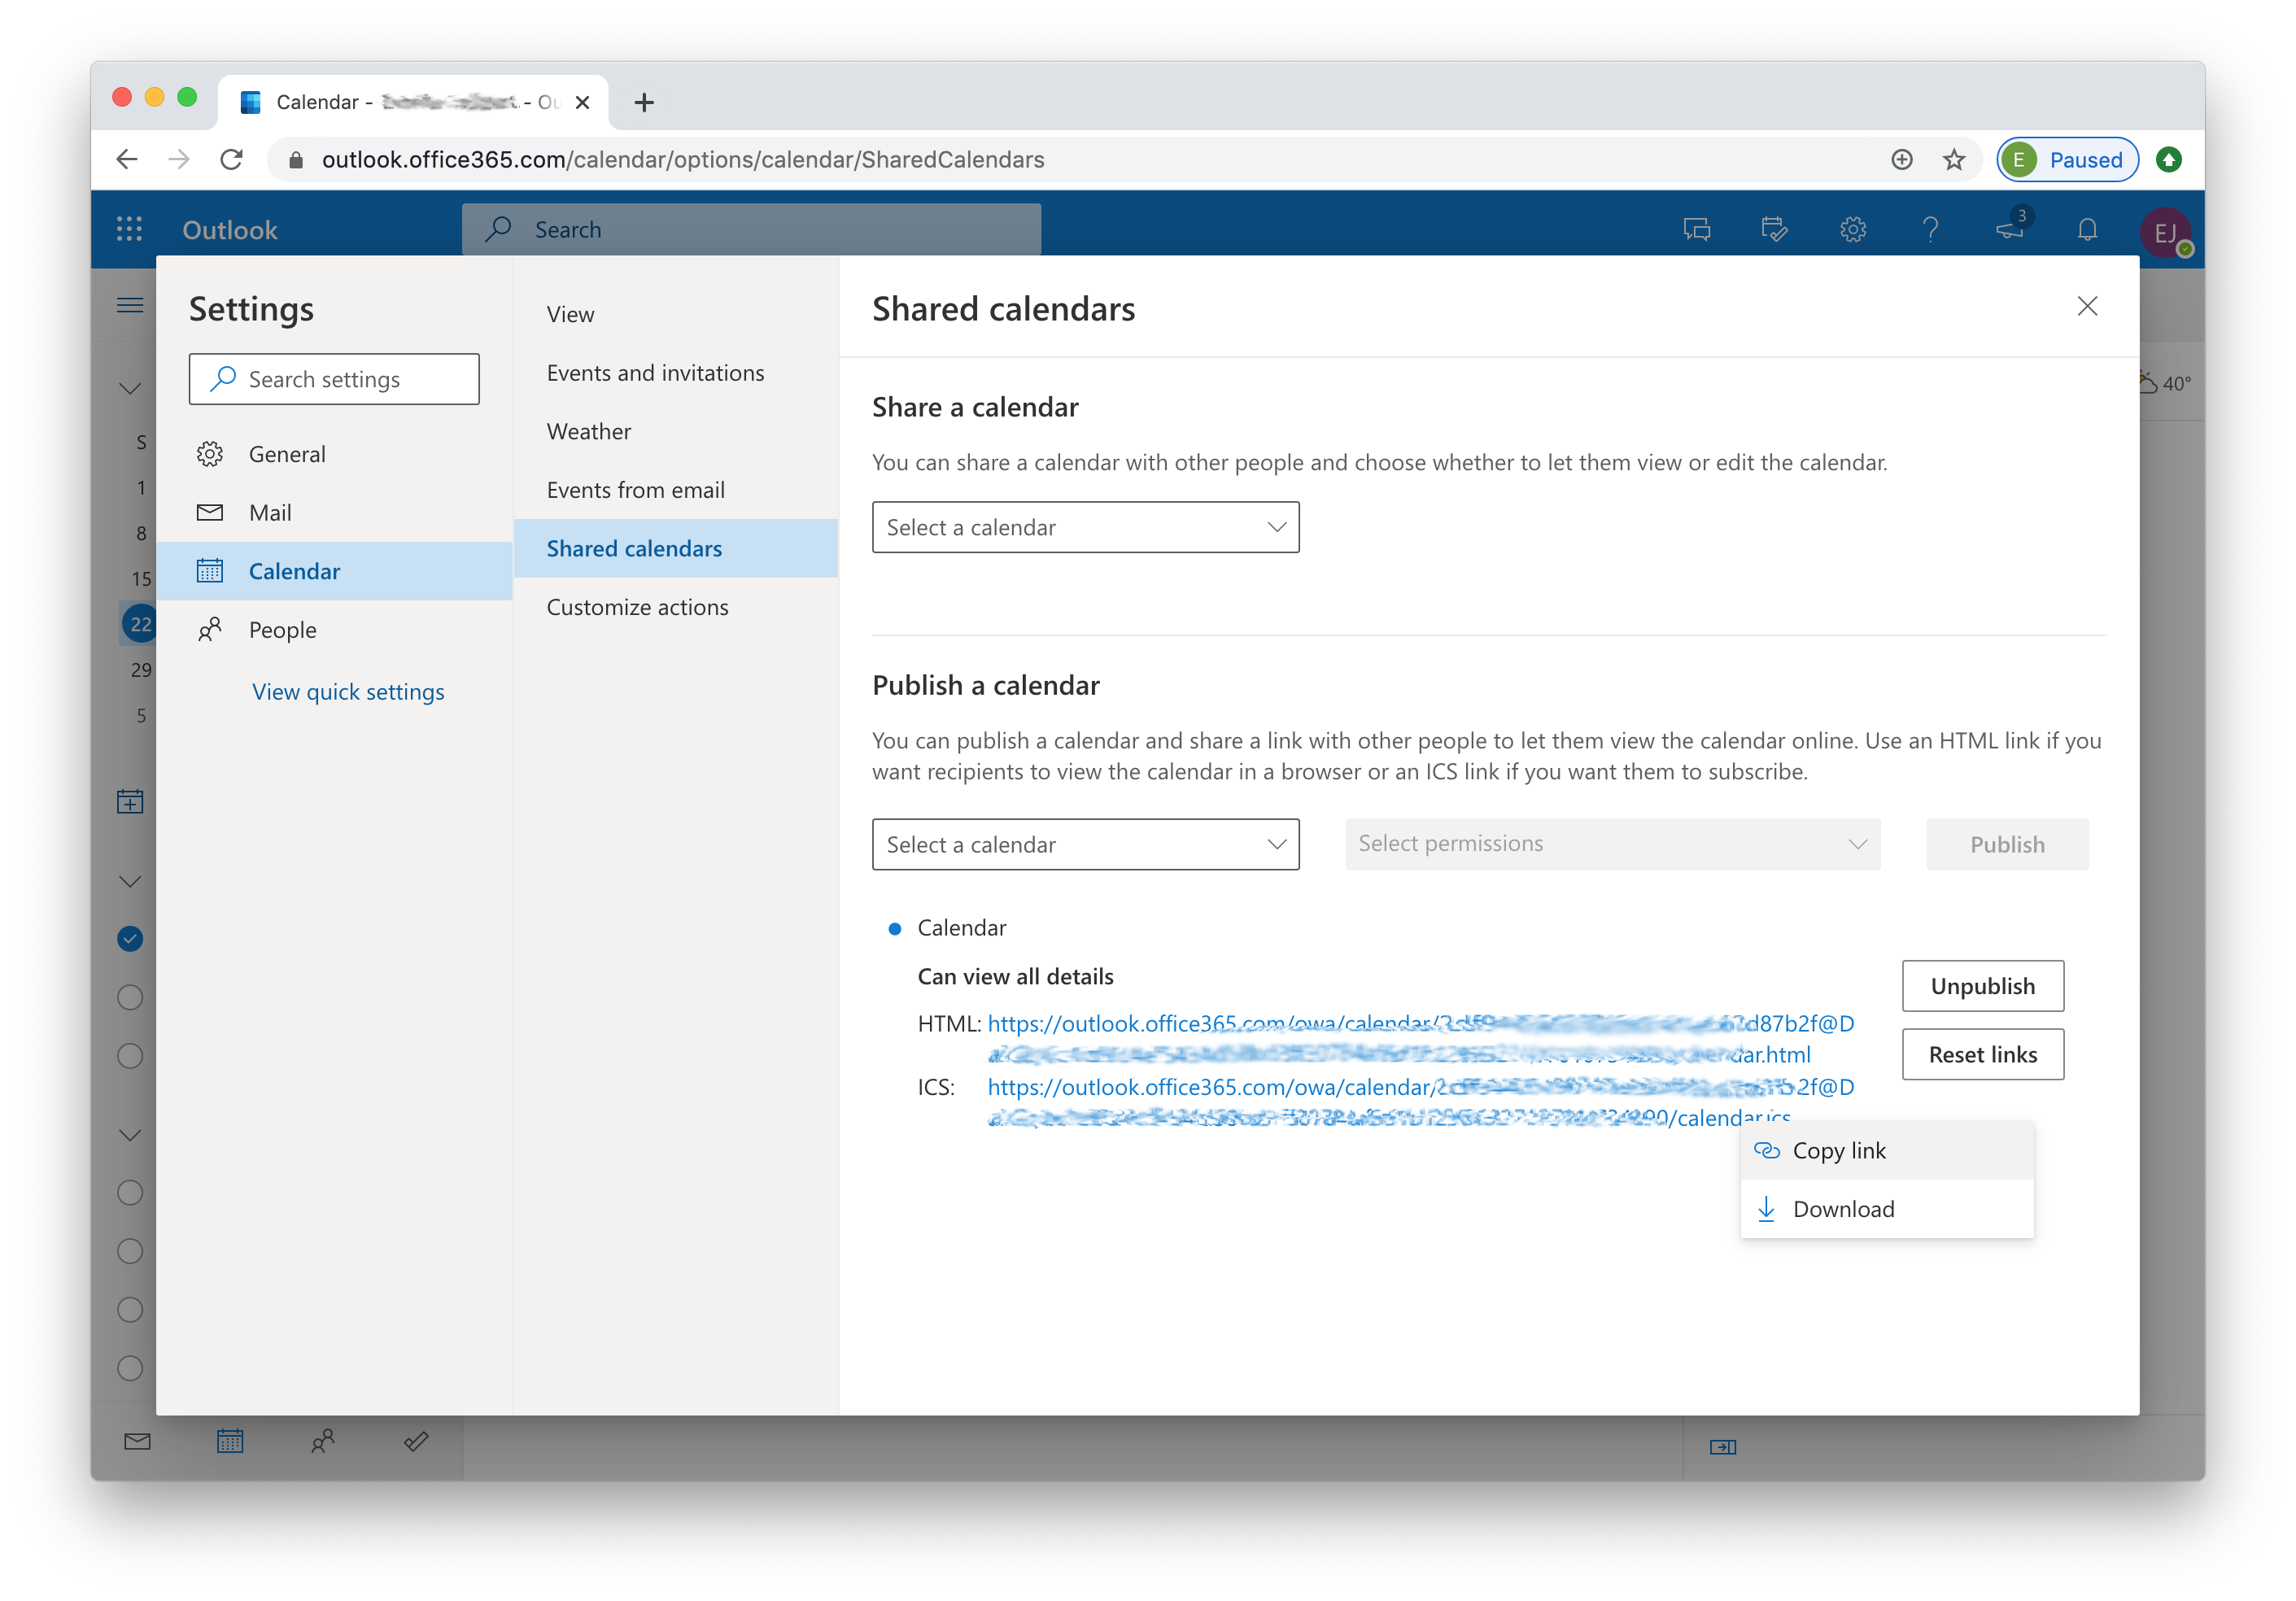
Click on the ICS link, then choose “Copy link”.
Switch to the Clockk Desktop app and navigate to the Calendar section. Click “+ Add new calendar”.
Paste the link into the “ICS url” field in the Clockk Desktop app.
Name your calendar after the email address associated with this calendar.
