Harvest vs Toggl Track: 2023 comparison
Clockk • July 11, 2023
Harvest and Toggl Track are both manual (timer based) time tracking apps. Users are required to actively record their time, by starting and stopping a timer, while they work and switch between tasks.
They are used by freelancers, agencies and consultancies to track how much time is spent on projects.
Read on to learn more about the features and pricing of Harvest and Toggl Track.
Pricing
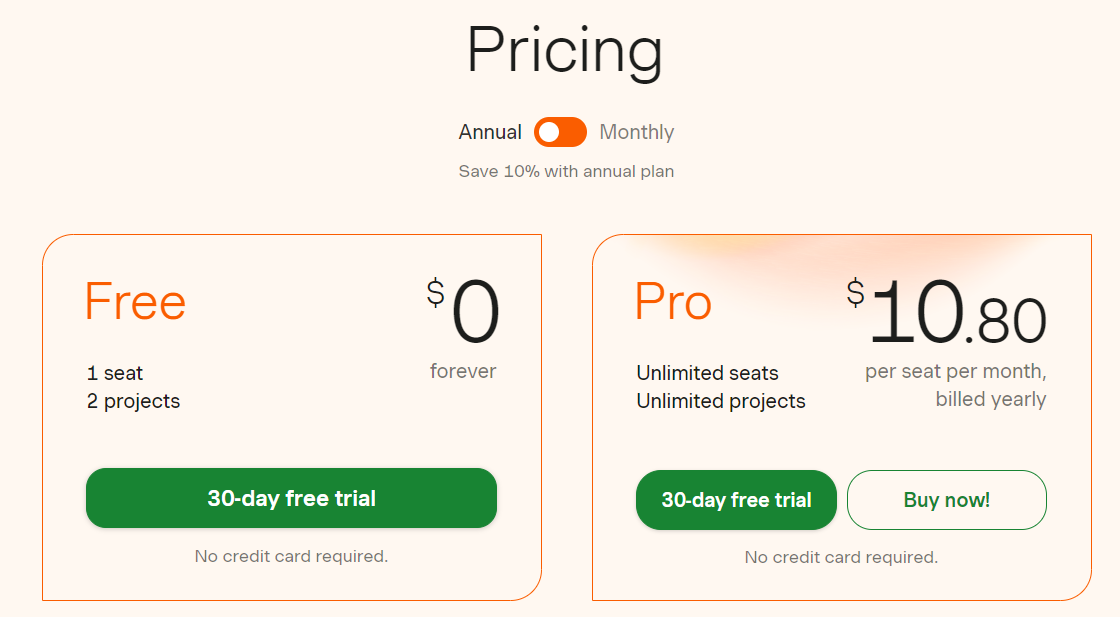
Harvest has two available plans.
Free - 1 seat, two projects
Pro - $10.80/month on annual subscription - Unlimited seats, unlimited projects
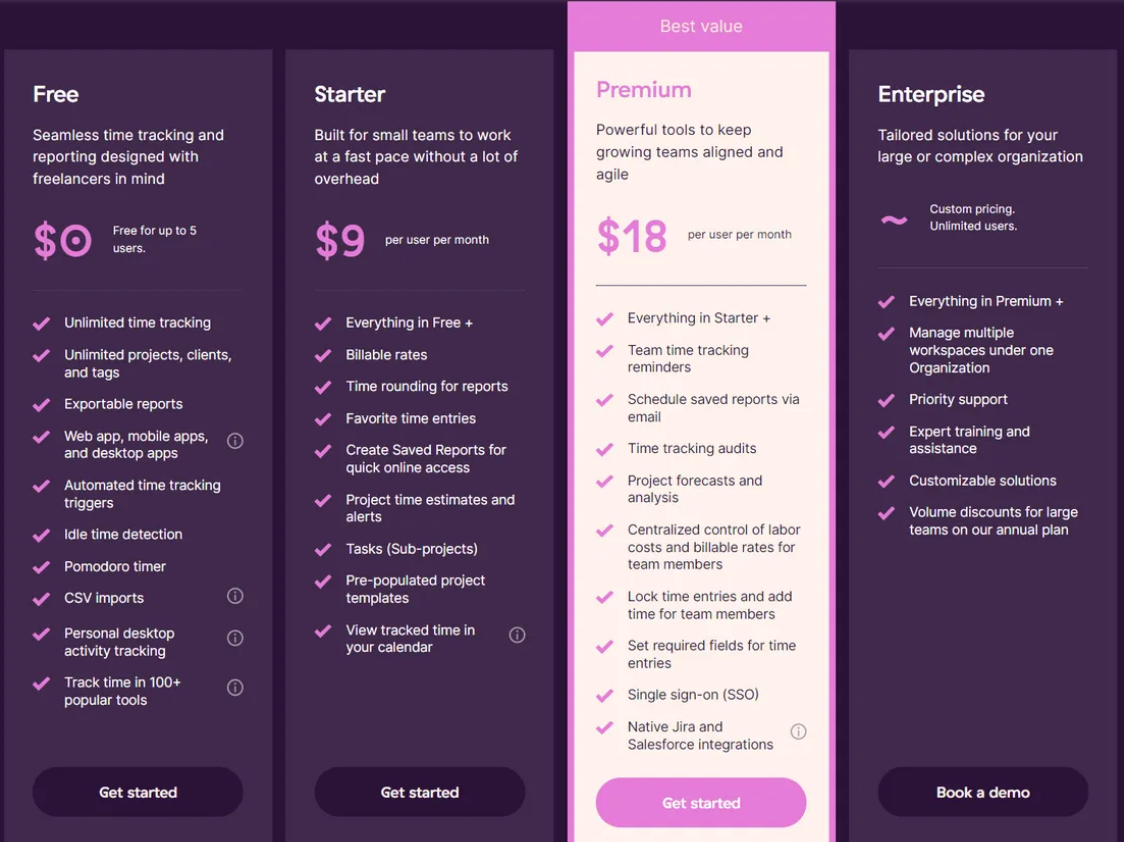
Toggl Track has 4 available plans.
Free - Great for freelancers or small businesses of up to 5 people. It has basic features such as unlimited time tracking, unlimited projects and clients, report analytics, idle detection, Pomodoro timer, and others.
Starter - Great for small teams. It has additional features such as billable rates, time estimates on projects, and tasks (sub-projects).
Premium - For multiple teams. It has features such as time tracking reminders, time audits, Insights, and project forecasts and analysis.
Enterprise - For large complex organizations. It has options such as expert training and assistance and priority support.
Harvest vs Toggl Track Features
Time Tracking
Harvest is a manual time tracking app. Users are required to start and stop a timer to record their time, while they work and switch between tasks.
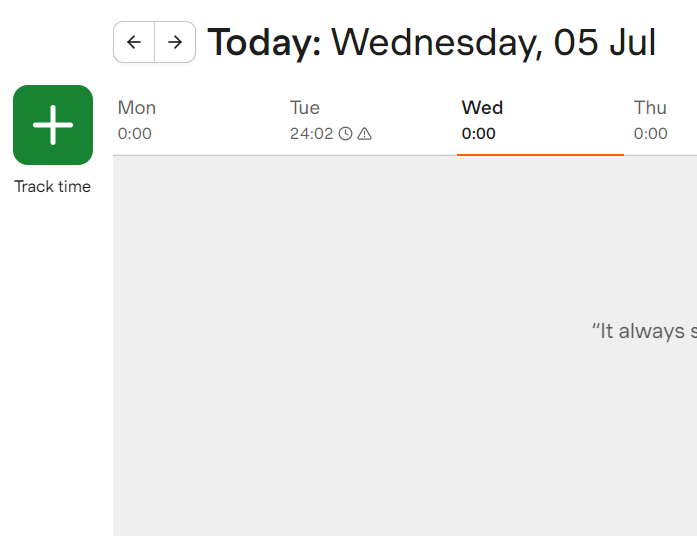
To start tracking time in Harvest, click the green + button on the left hand side of the window that says track time. Then choose the project that it’s for and the timer will start.
When you are done tracking time, hit the stop button on the right hand side of the window. If you want to track time again for the same project you can hit start on that time entry to restart the timer. You can also edit and add notes to your time entries.
Toggl Track is also a manual time tracking app. Start the timer by hitting the pink play button at the top right corner of the web app or hitting N on your keyboard. You can also start the timer by typing in a description where it says “what are you working on?”.
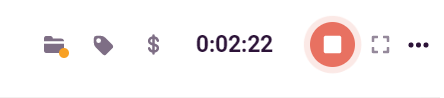
Stop the timer by hitting the orange stop button or S on your keyboard. Before you stop the timer make sure you fill in the description, project, tag, etc.
Toggl Track does have some automatic time tracking features within the desktop app that requires a bit of setup. To use the autotracker feature you need to trigger it by setting up keywords. These keywords allow you to receive time tracking notifications or automatically start tracking when you open an app that matches the keyword set. You can adjust these triggers under the "Autotracker" tab.
The upside of manual time tracking is that it is simple to understand and easy to use. The biggest downside of manual time tracking is forgetting to start and stop the timer. If you left your timer running, Harvest and Toggl Track both send you an email to notify you.
Interface
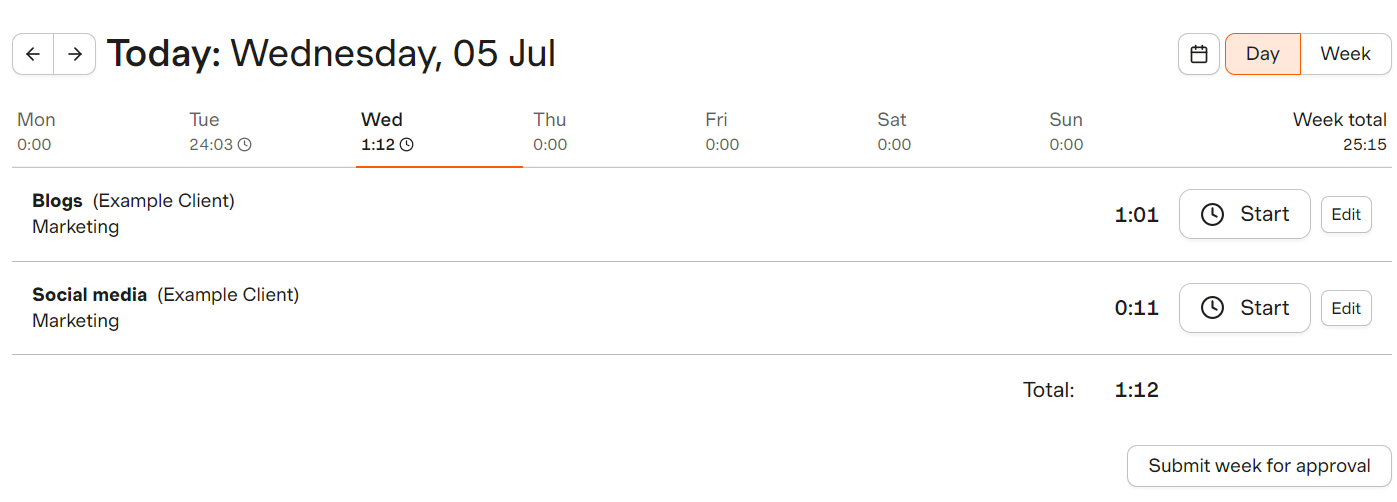
Harvest shows your time entries in a list that you can view by the day or week.
The Day view shows you every project you worked on that day and for how long. From the Day view you can start the timer and edit and add notes to your time entries. This view is useful for tracking your time as you work.
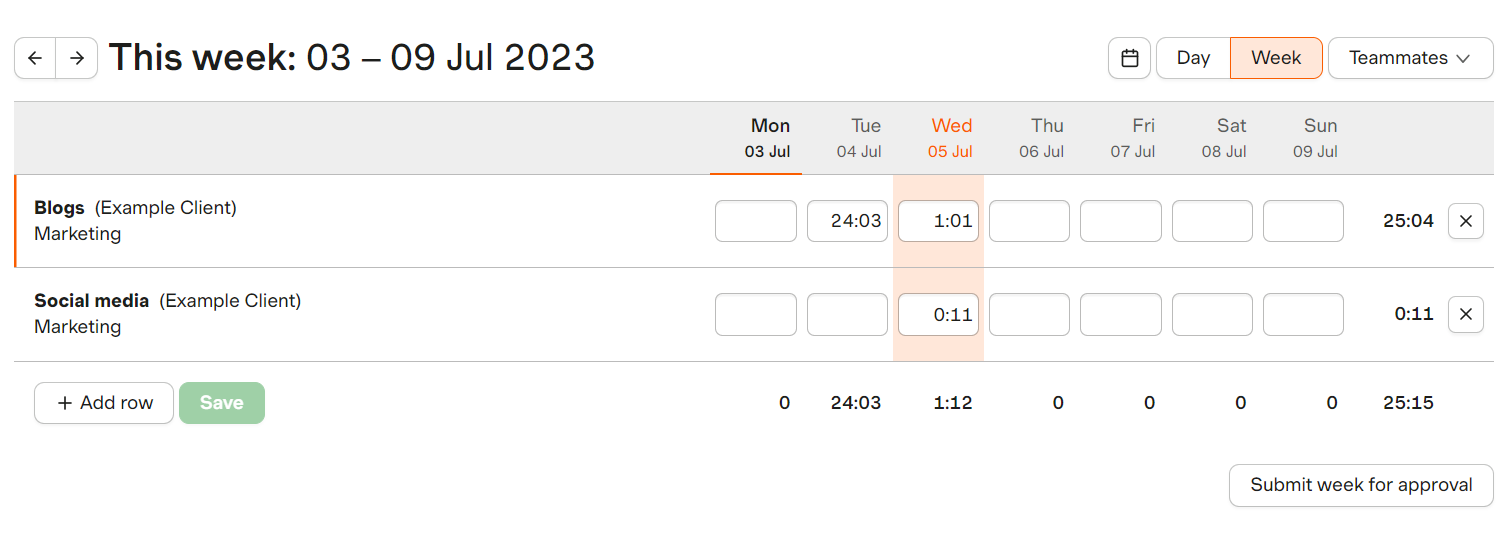
The Week view shows you a list of every project you worked on that week and how much time was spent on each project each day. From the Week view you can manually add in time entries and make any edits to time entries. This view is useful for adding in a lot of time at once without needing to click through to individual days.
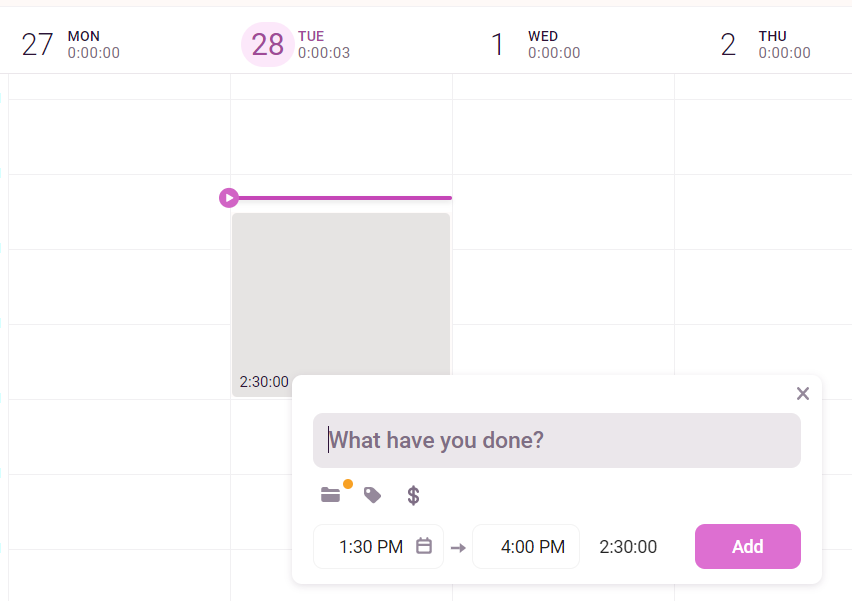
With Toggl Track you can also view your time entries as a list or in the Calendar view. The Calendar view shows your work in blocks with the time of day on the left hand side. The calendar view is helpful if you need to know the time of day that you were working on your projects.
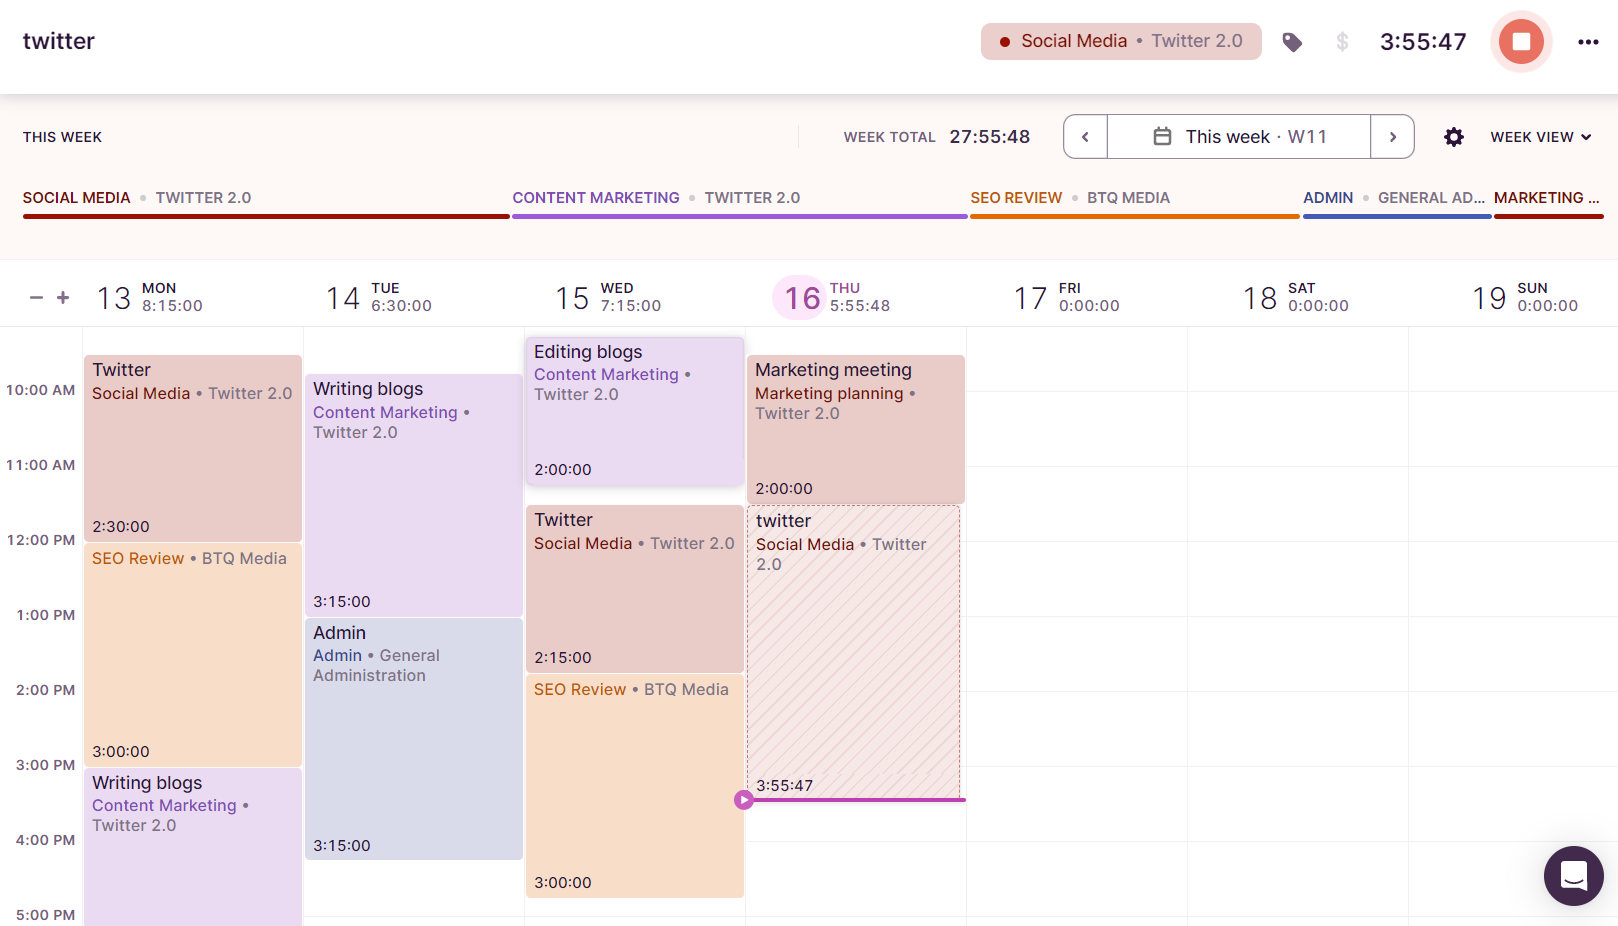
You can easily add time by clicking and dragging on the calendar. You can add in the specific start and stop time or add in the total length of time.
Reports
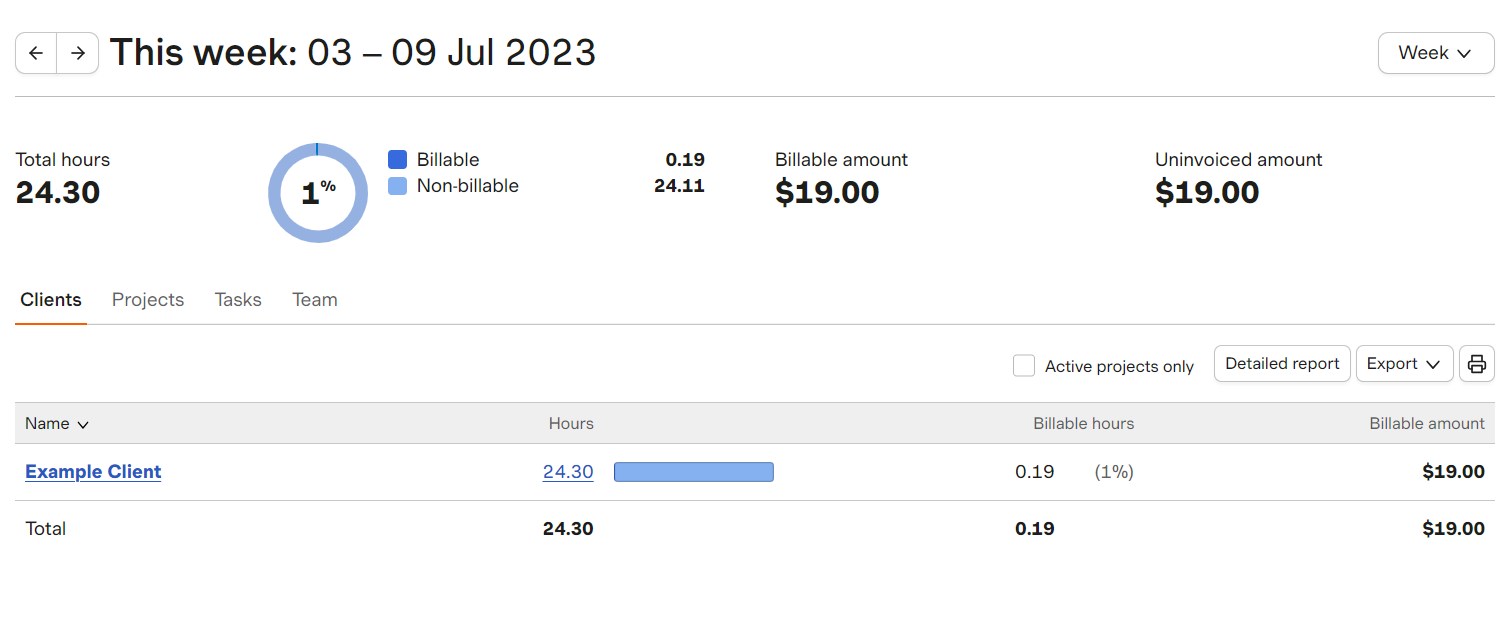
Harvest reports gives you insight into the hours spent on each project and allows you to understand total costs, profitability and the time specific tasks take to complete.
- View detailed reports of hours spent per week, project progress, and your remaining project budget.
- See the percentage of your time spent on non billable and billable projects and the amount to be invoiced.
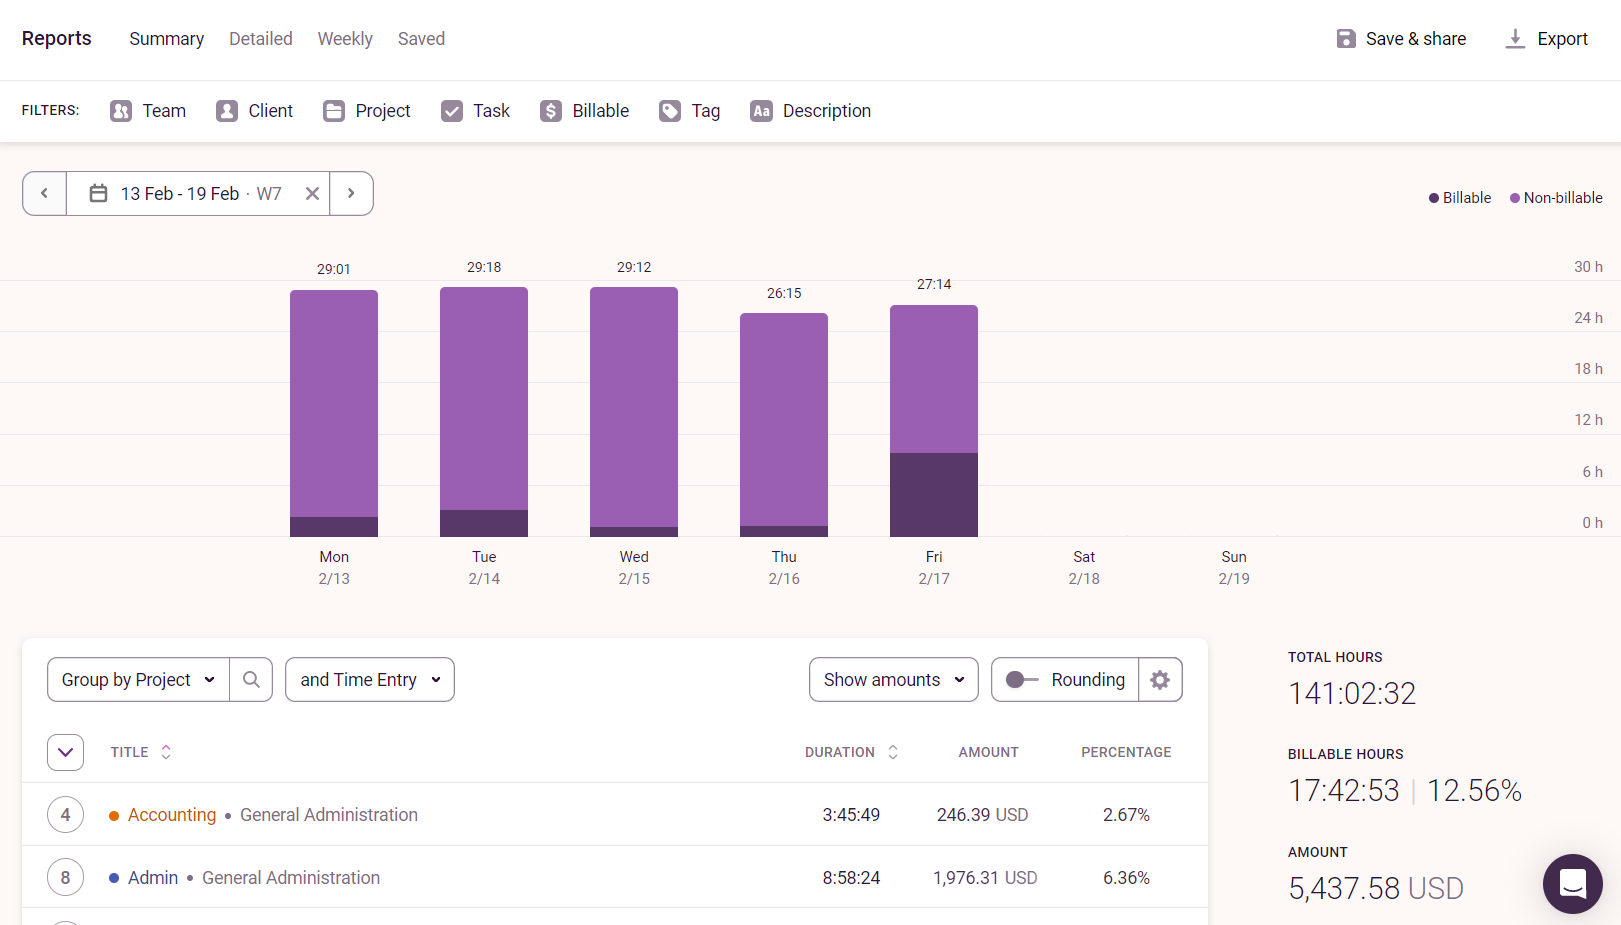
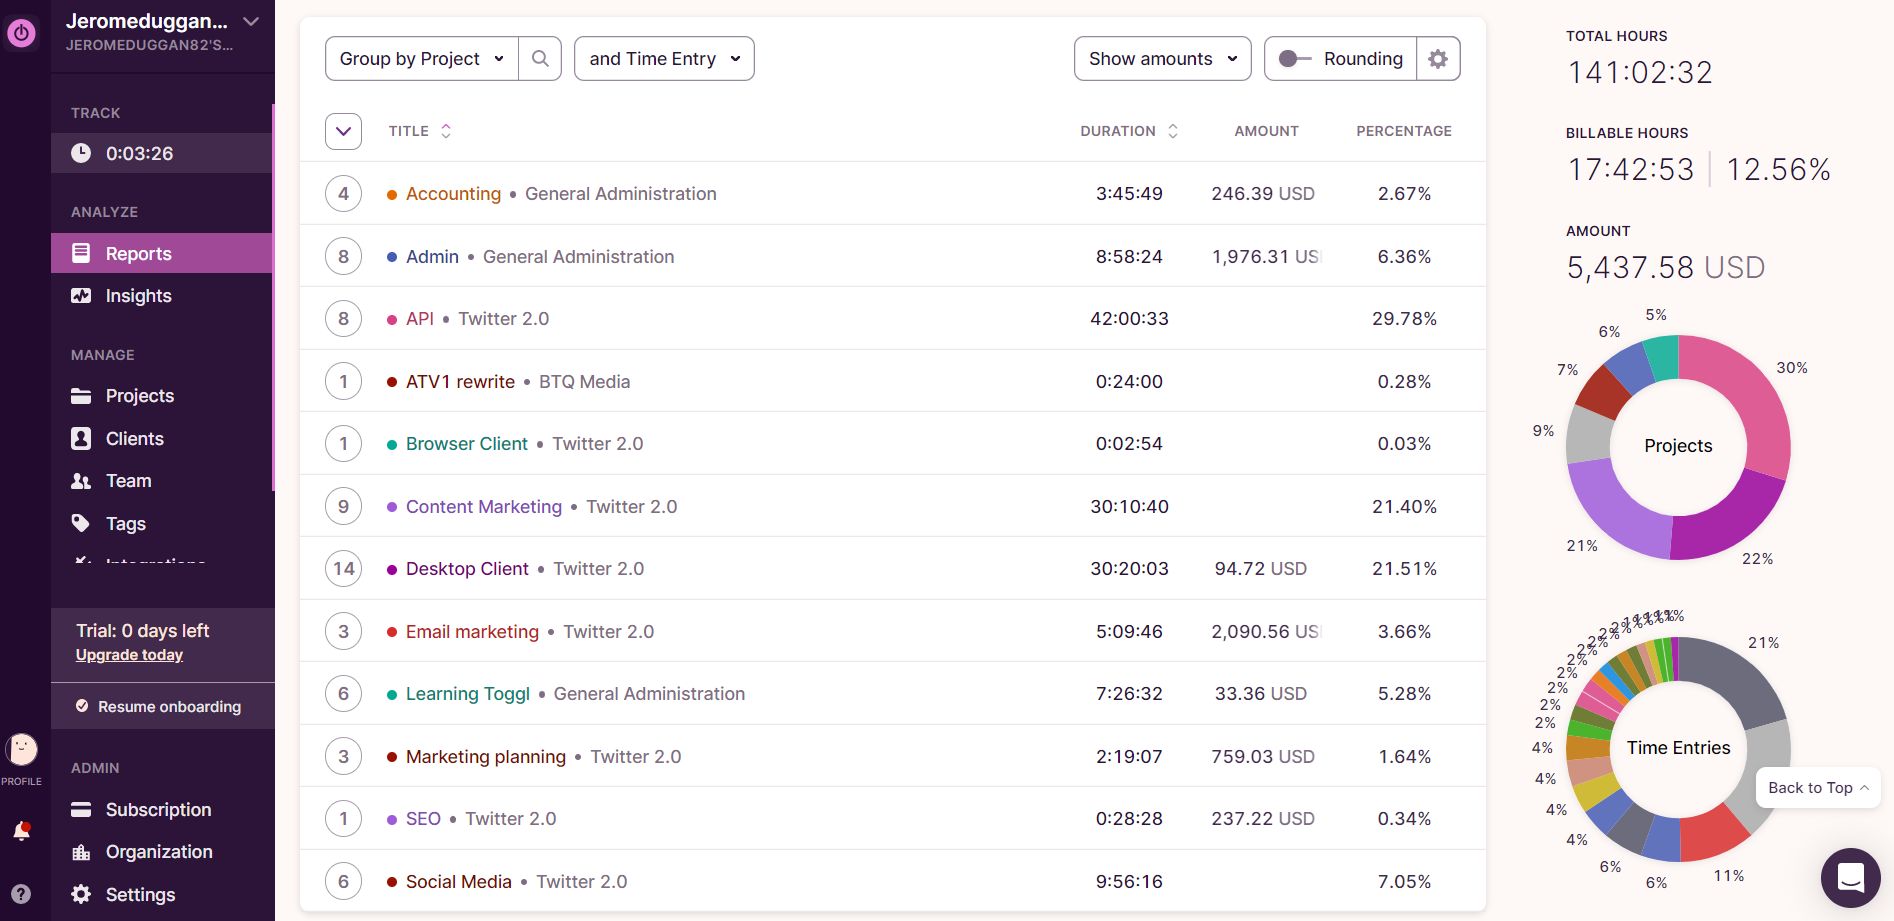
With Toggl Track you can view total tracked time and get a detailed view of each individual time entry. Filter reports by date, client, project, tag, description, billable or non billable, task, and team.
- Export reports so you can easily share with clients.
- Set hourly rates for your projects and Toggl will calculate everything.
- Set time estimates on projects to see how actual work compares.
Invoicing
With Harvest, you can easily transform timesheets and expenses into invoices. You have the convenience of sending invoices through email or exporting them as PDF and HTML files. You can also accept payments from clients and see an overview of open and paid invoices. To ensure prompt payments, you can set up automated reminders, sparing your clients from any potential forgetfulness.
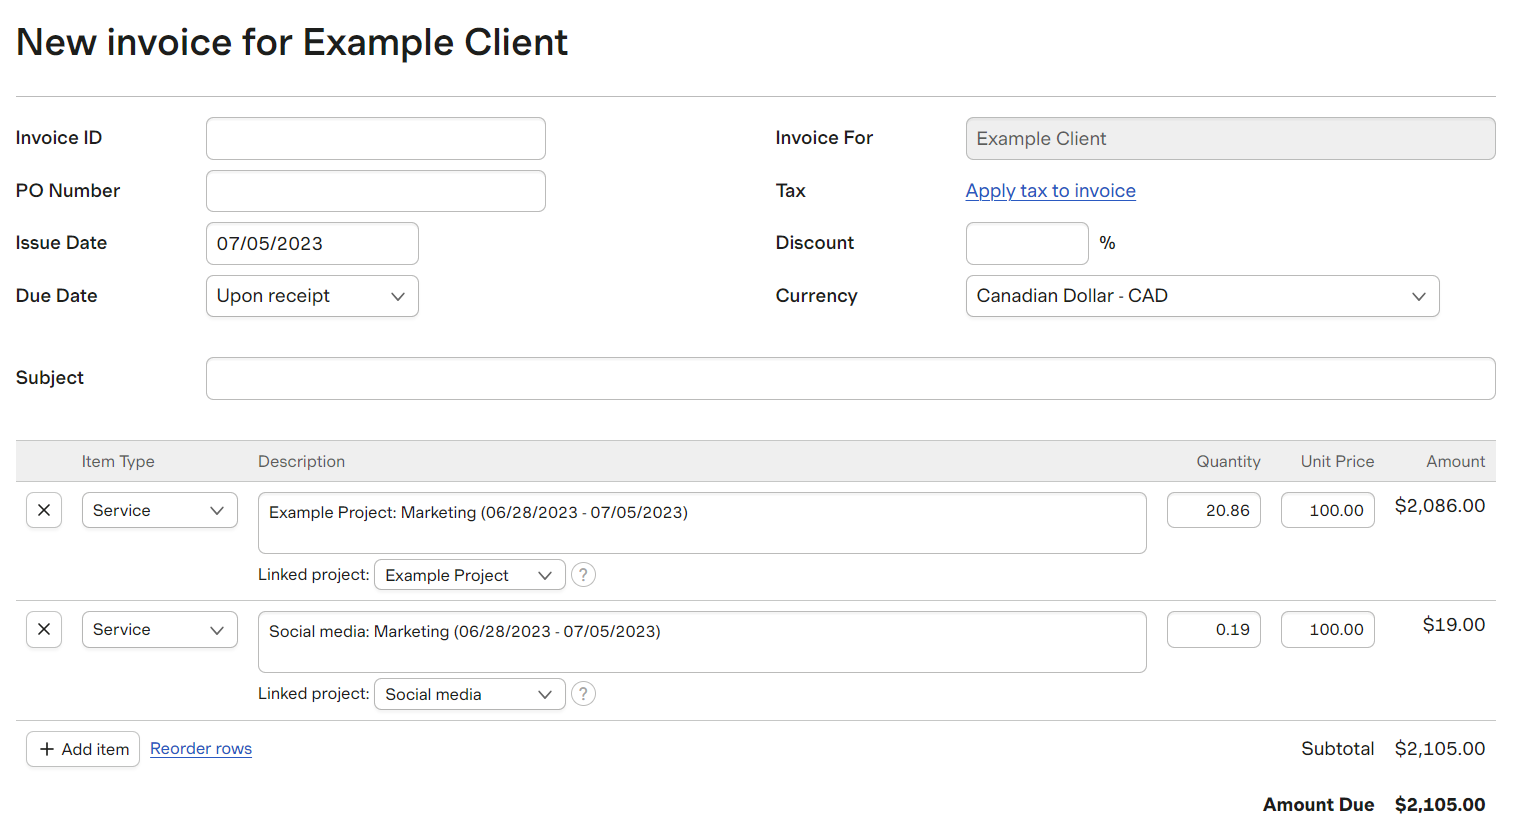
Toggl Track offers a PDF invoice template that you can easily download and fill out. However, you can't automatically send an invoice via email.
Competitors
The biggest drawback with Harvest and Toggl Track is that you need to start and stop a timer to track your time. Timers are easy to forget, which leaves you with inaccurate data.
Clockk
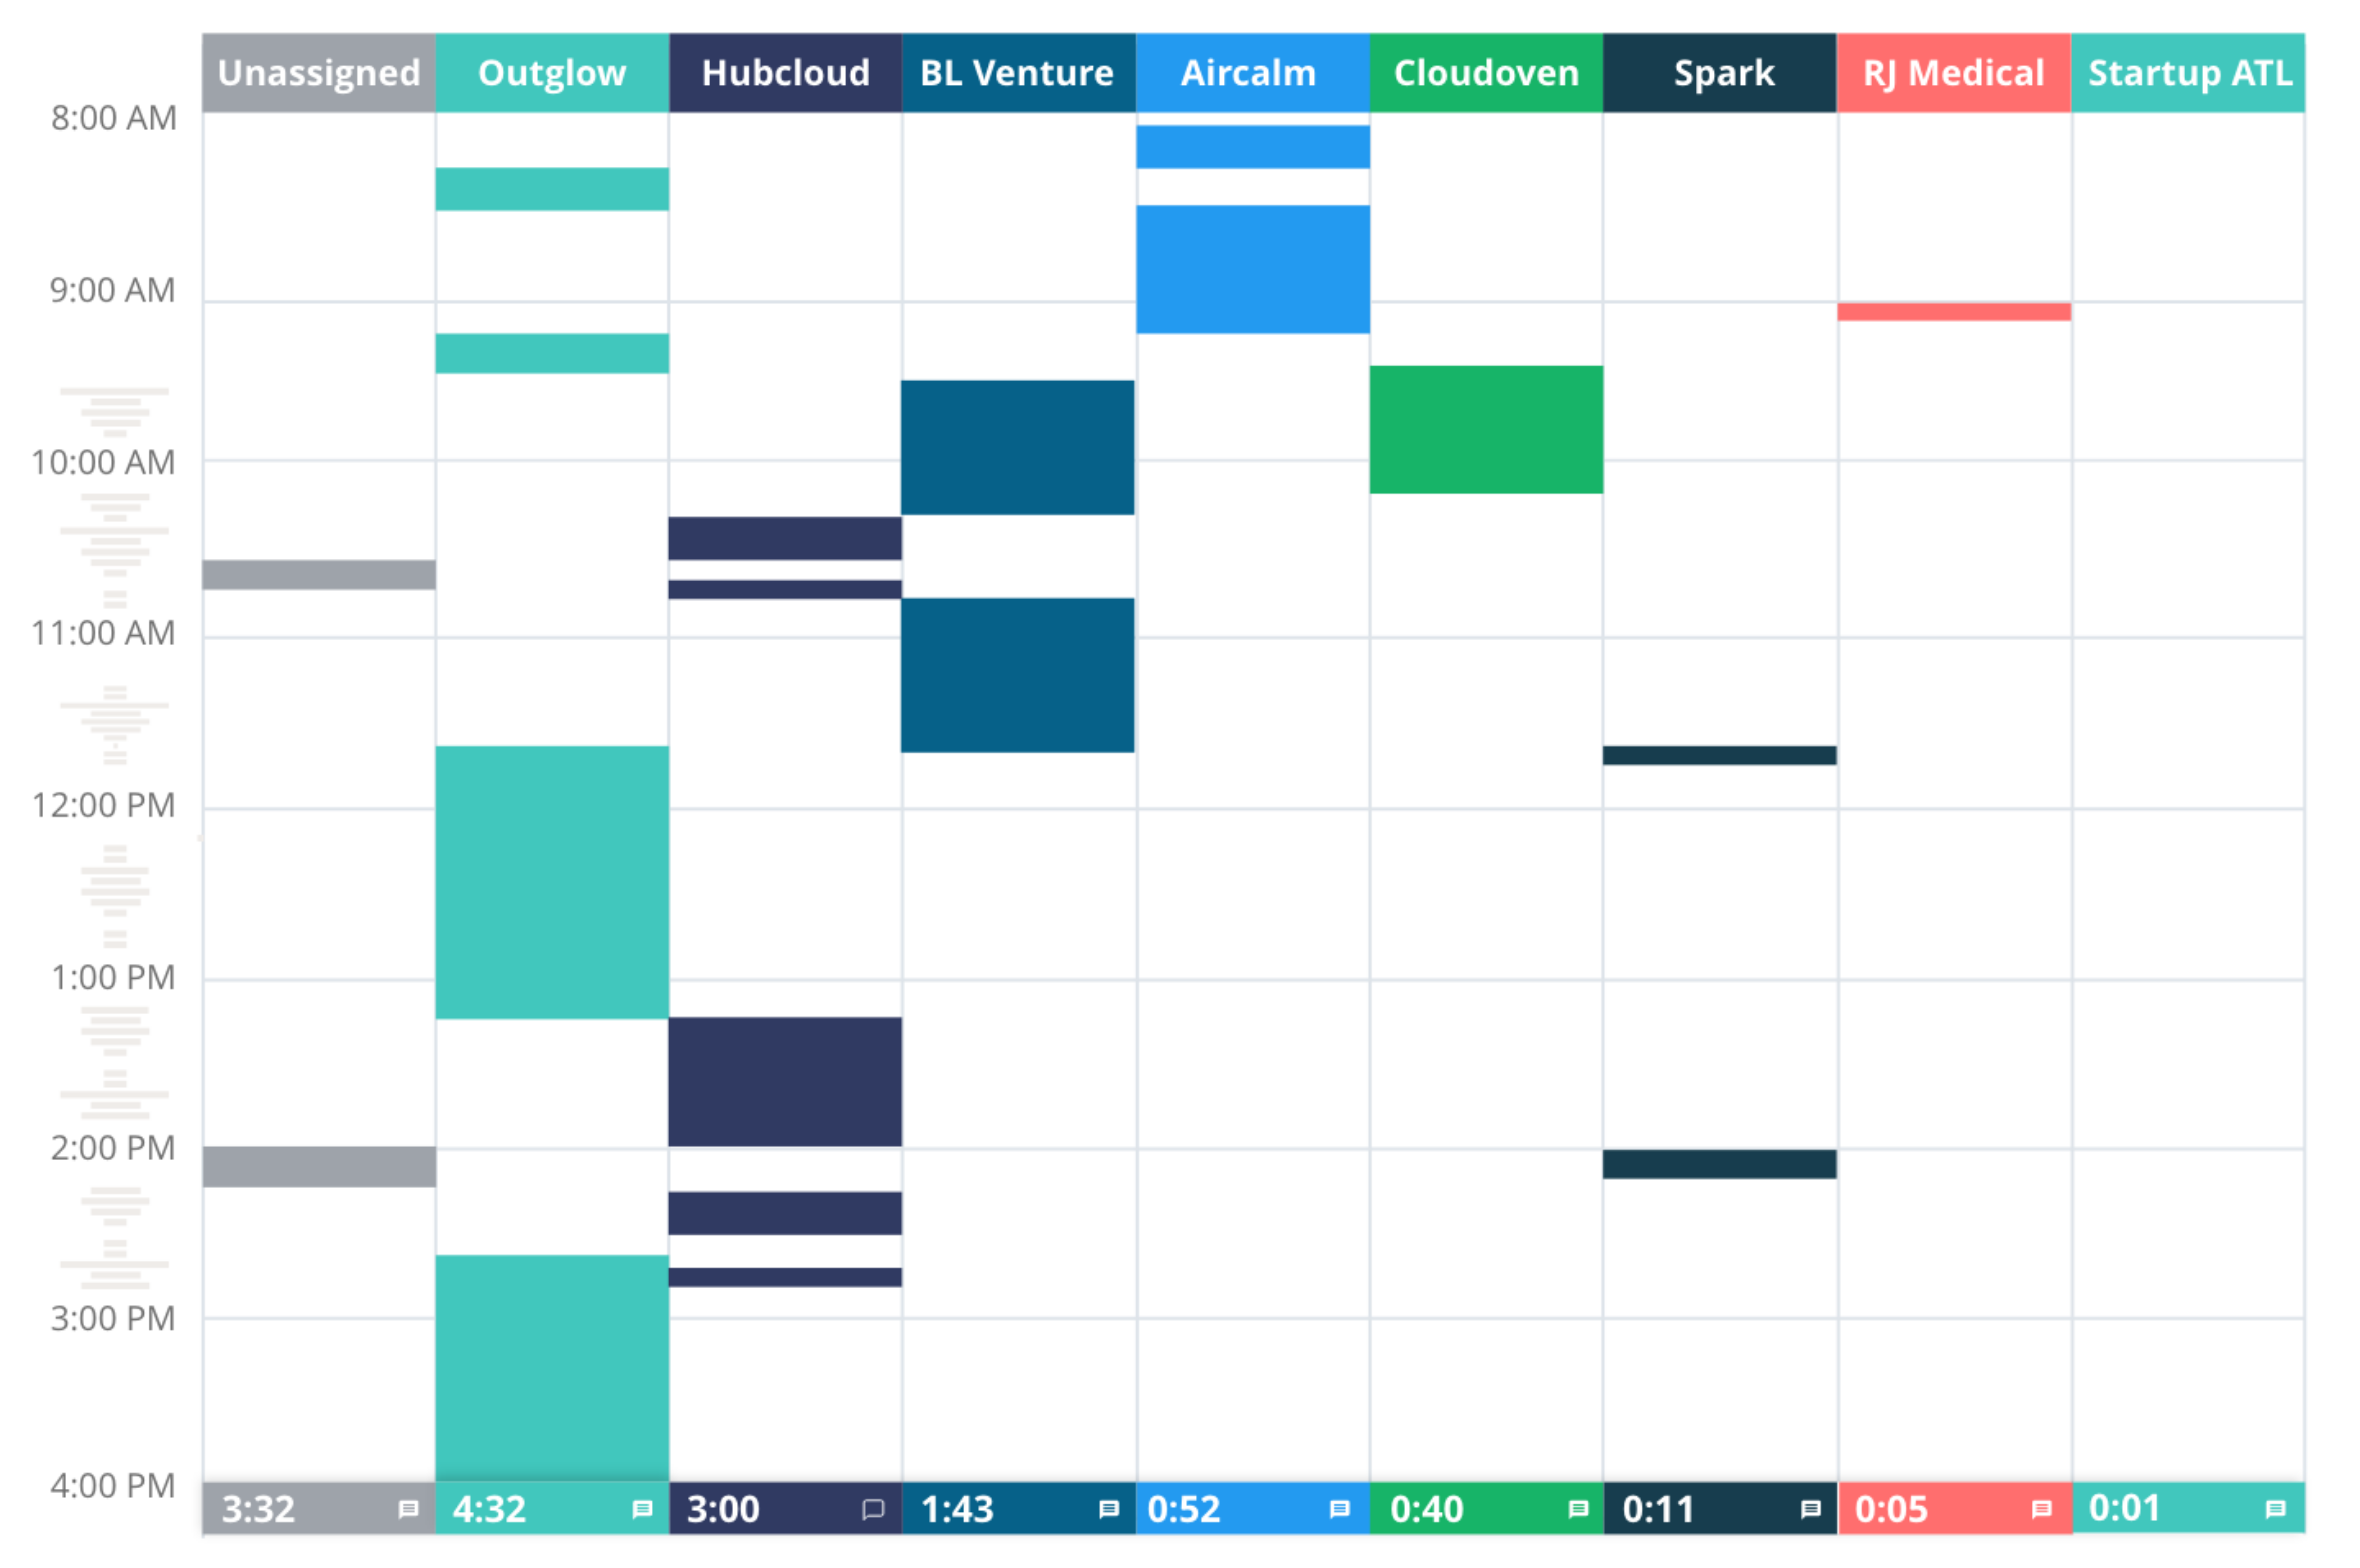
Clockk is an automatic time tracking app that runs in the background tracking what websites and apps you're using. Clockk has an Assign Always feature that automatically assigns the same task to the designated project in the future. You can view your work organized by project/client in Clockk’s Activity view.
The main difference between Clockk and other automatic time tracking apps is that Clockk has the ability to distinguish between different projects within the same app. Most other apps can’t distinguish between different documents or projects.
timeBro
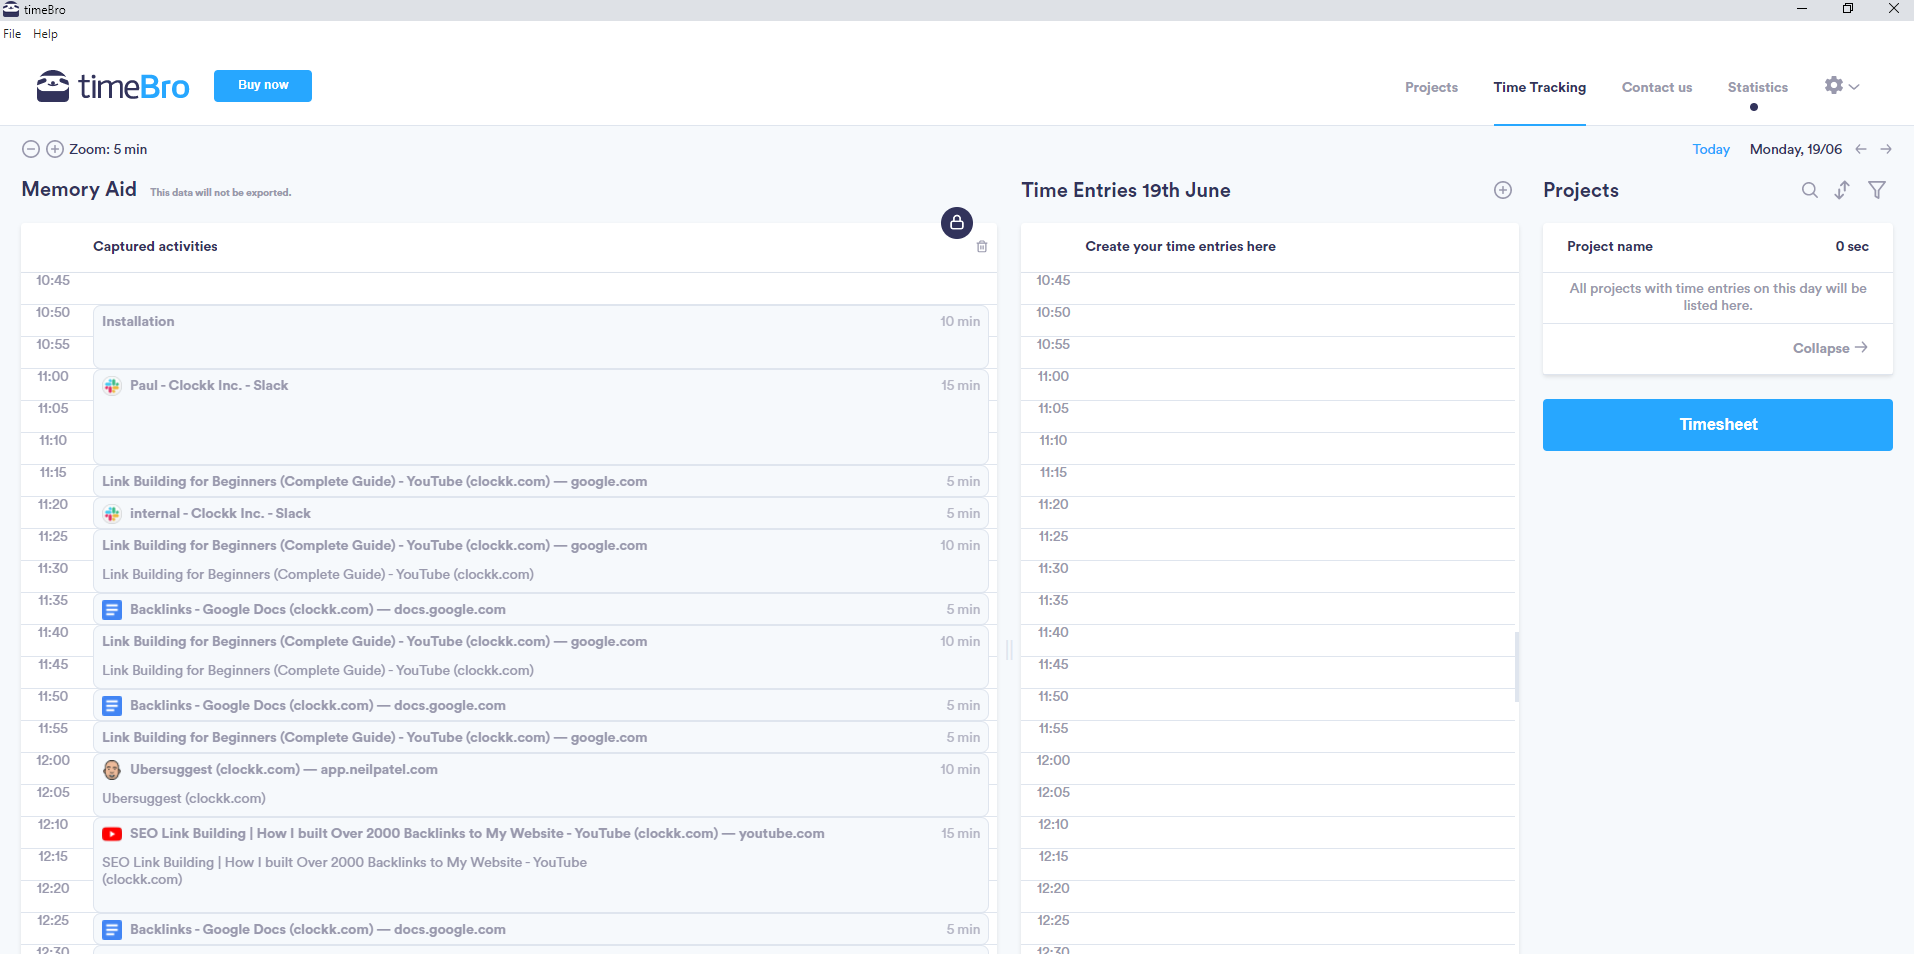
timeBro is also an automatic time tracking app. You can carry on with your work as usual while timeBro runs in the background recording the time you spend using different apps and websites.
The main difference between timeBro and Clockk is that timeBro does not automatically assign your work to projects. You have to manually review your tracked data day by day and assign each task to the corresponding project.
With timeBro you can view your tracked time in the left hand column of the interface. Your work will appear in 5 or 6 minute intervals (depending what you set it as) displaying the name of the app you spent the most time on during that interval. You can click on the block to get a breakdown of everything you did in that time interval.

ClockTrace
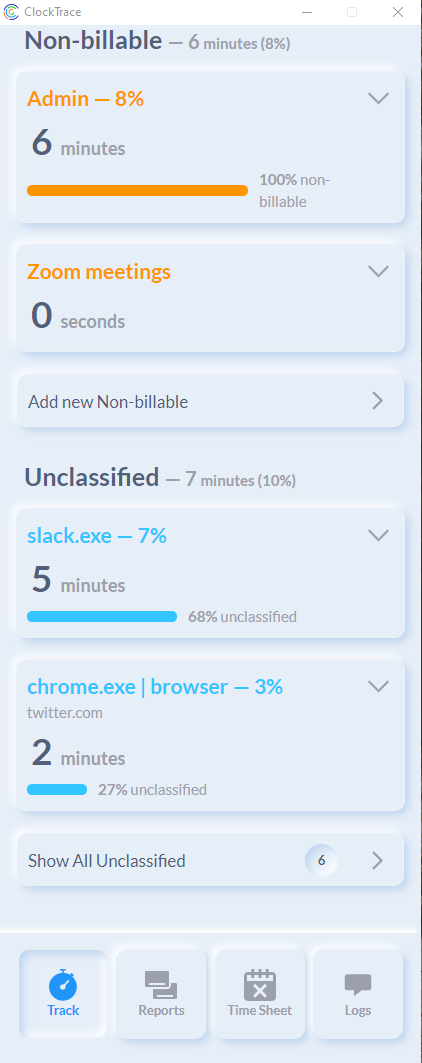
ClockTrace is also an automatic time tracking app. ClockTrace is a long skinny window that you can keep open on the side of your screen as you work. It groups your projects under “billable,” “non-billable,” and “unclassified.” You can view your tracked time by day, week, month or year.
The unique thing about ClockTrace is how you assign work to projects. When you create projects you identify keywords that belong to that project. If you’re working on something that has the keyword in it (names of files, or apps you're using) ClockTrace will automatically assign it to that project.
You want to make sure each keyword is specific enough to the project it belongs to or some of your work might go to the wrong project. For example, if you use the same app for only one project you can use the name of that app as a keyword. If you use the same app for multiple projects, you should choose a different keyword, such as a the file name. If you’re working on something that doesn’t get assigned to a project, it will show up under “unclassified.” You can click on your tracked time in that category and easily assign it to a project.

Ready to save time and find unbilled hours? Get Started